帮助中心
-
Quick Tutorials
-
Video Tutorials
- How to install and sign in to WhatsApp
- How to install and sign in to Instagram
- How to install and sign in to Snapchat
- How to install and login ThreeKingdoms
- How to Install and login to Amazon
- How to install and sign in to Line
- Successfully log in to WeChat and Momo
- How to install and log in to Facebook
- How to install and log in to Telegram
- V2ray usage tutorial
- How to install and log in to REDnote
- How to install and login to TikTok
-
Guide To Sign In
-
Purchase And Recharge
-
BlueGenie Box
-
Functional Process
-
Cloud Phone Operation
-
Supporting Services
-
App ane Files
-
System Apps
-
Common Problem
-
User Agreement
-
Activity
- Want to become a Hippo Cloud channeler?
- The annual double 11 carnival is here!
- Warm Christmas, prices plummet!
- Price Reduction Activity
- New Year's Warm Reminder
- K11 Channel Merchant Recruitment
- About Streaming acceleration
- Hippo Cloud payment methods
- Hippo Cloud helps users doing business
- Anniversary recharge gift!
- Christmas recharge rewards
- Happy Chinese New Year
- Flagship Model X13 Officially Launched
- Christmas Gift , recharge and get gifts!
- Spring Festival Holiday Reminder
- Public Beta Testing
-
Information
How to install Xp Framework?
Tools used:
In this article, you will use: magisk, browser (uc browser, qq browser, whatever), EdXposed Manager, which can be found within the Hippo Store.
Xp Framework:
EdXposed framework is required for cloud phone version 9.0 and above.
Model-specific:
X11, R9.0
Operational Processes:
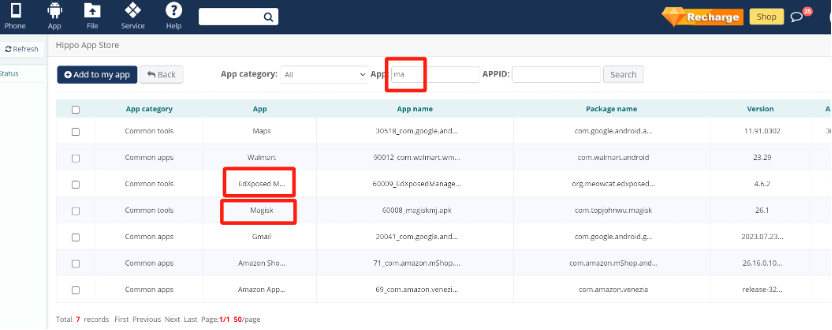
1. Click [Upload Apps] - [Hippo App Store], find magisk software and EdXposed software in the app store, check the box and click [Add to My Apps List], click OK.

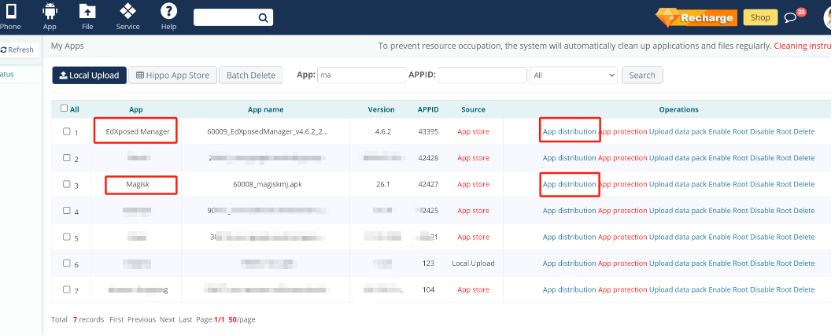
2. Go back to [My Apps] list and find magisk software and EdXposed software, click [App Install], select cloud phone grouping, click OK and wait for 5-10 minutes. If the installation is not successful, please restart the cloud phone and continue to wait for 5-10 minutes. Any problems can be handled by the exclusive service.
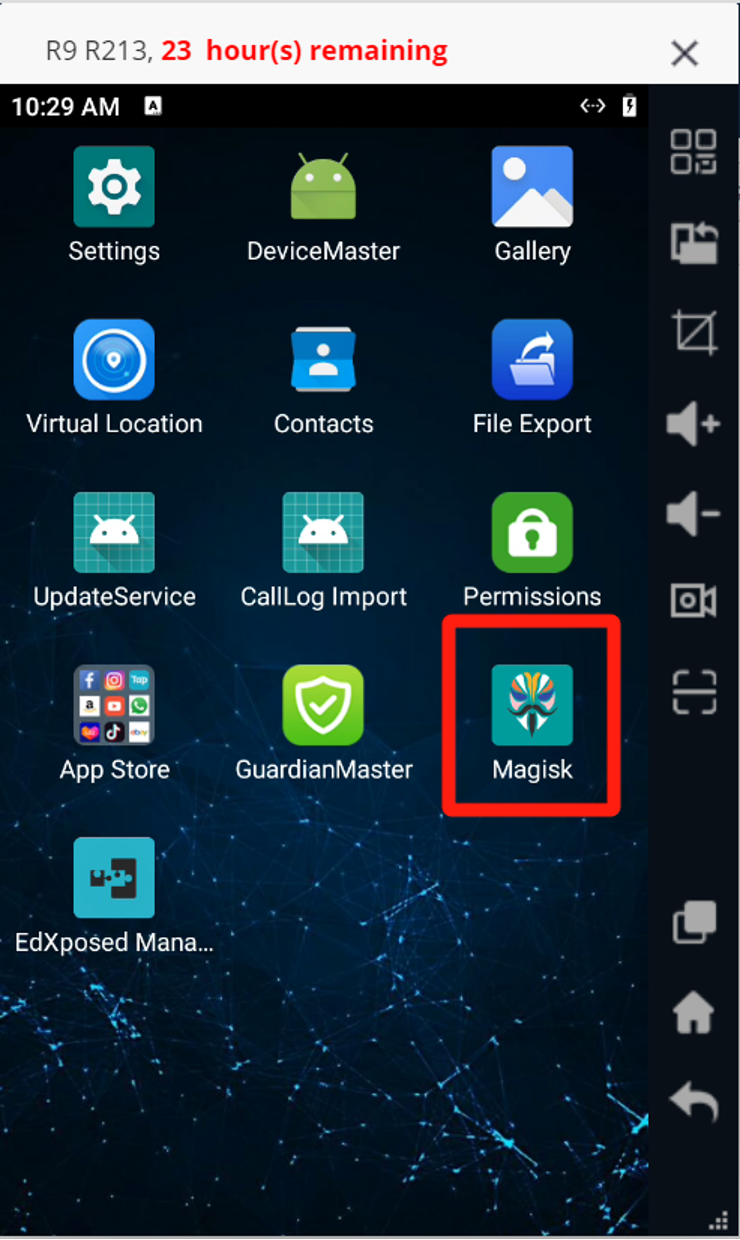
3. After the app is successfully installed, open the cloud phone control window and click [magisk] app.
Step 1: Open [magisk] and click the [install] button to enter the installation page.
Step 2: Check [recovery code] and click [next]
Step 3: Select [direct install] and click [Let's go].
Step 4: Once the installation is complete, click reboot (reboot time is expected to be 5-10 minutes)
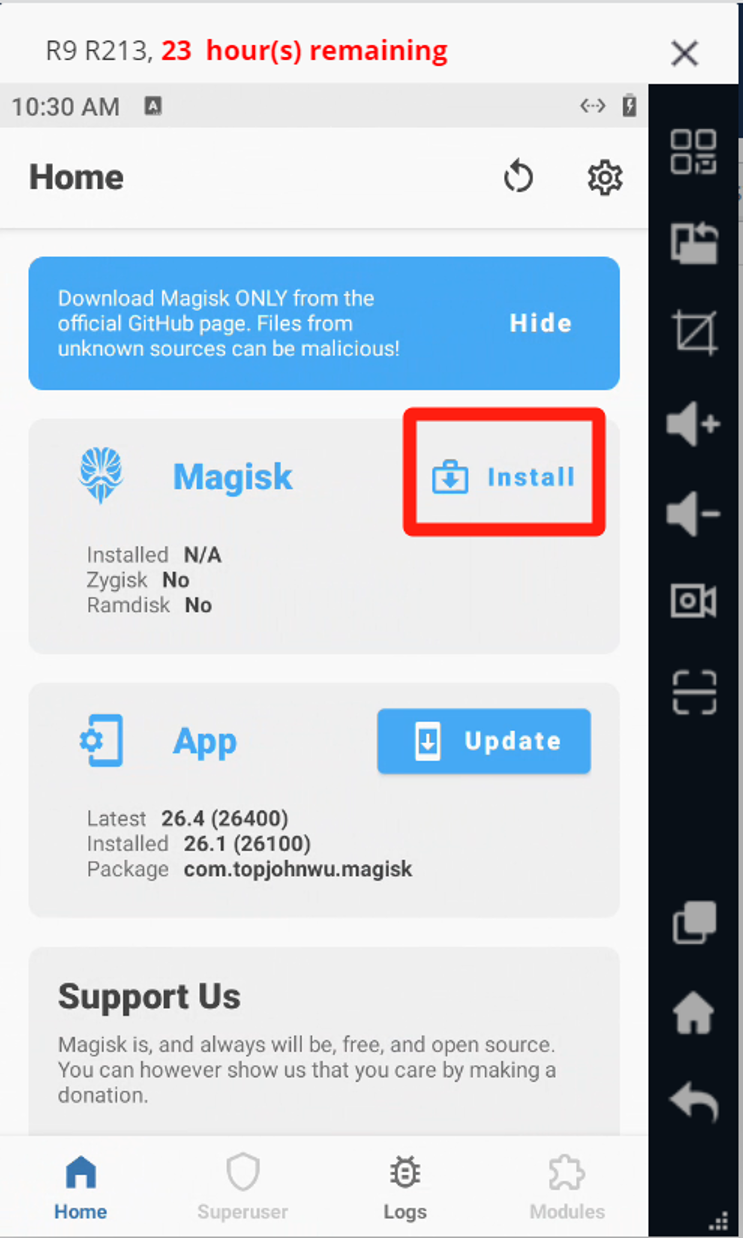
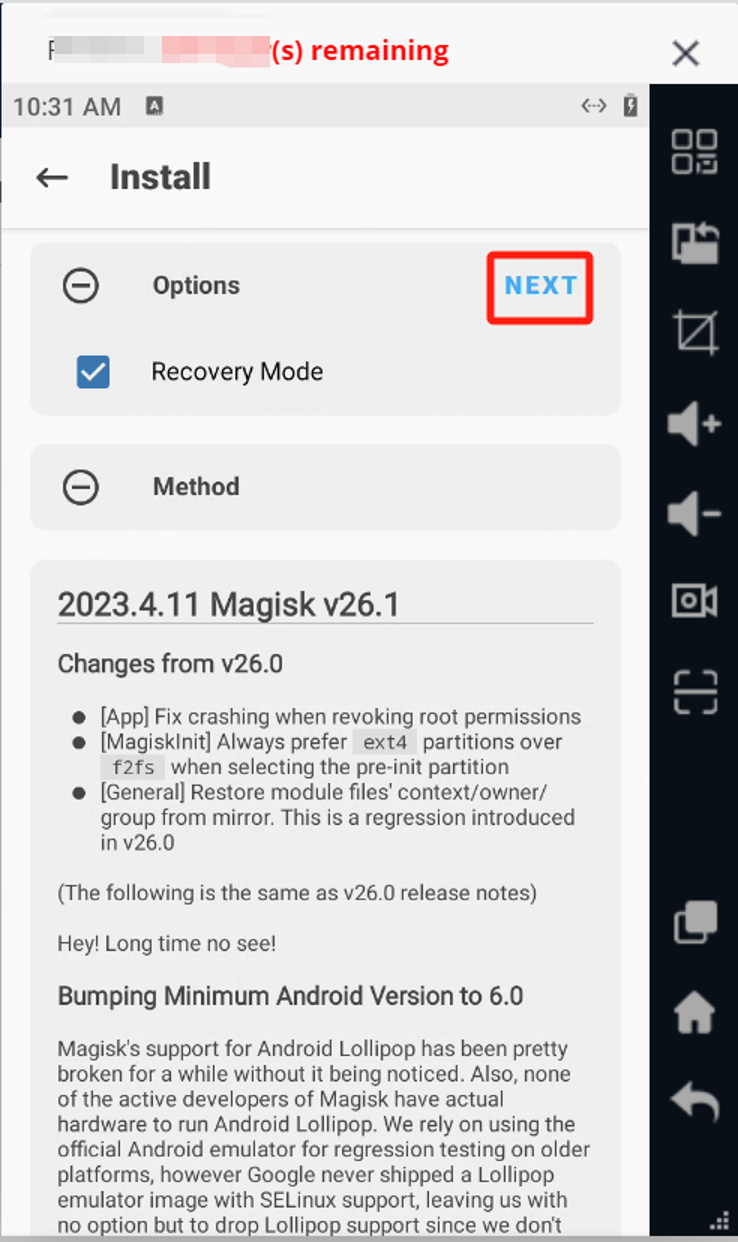
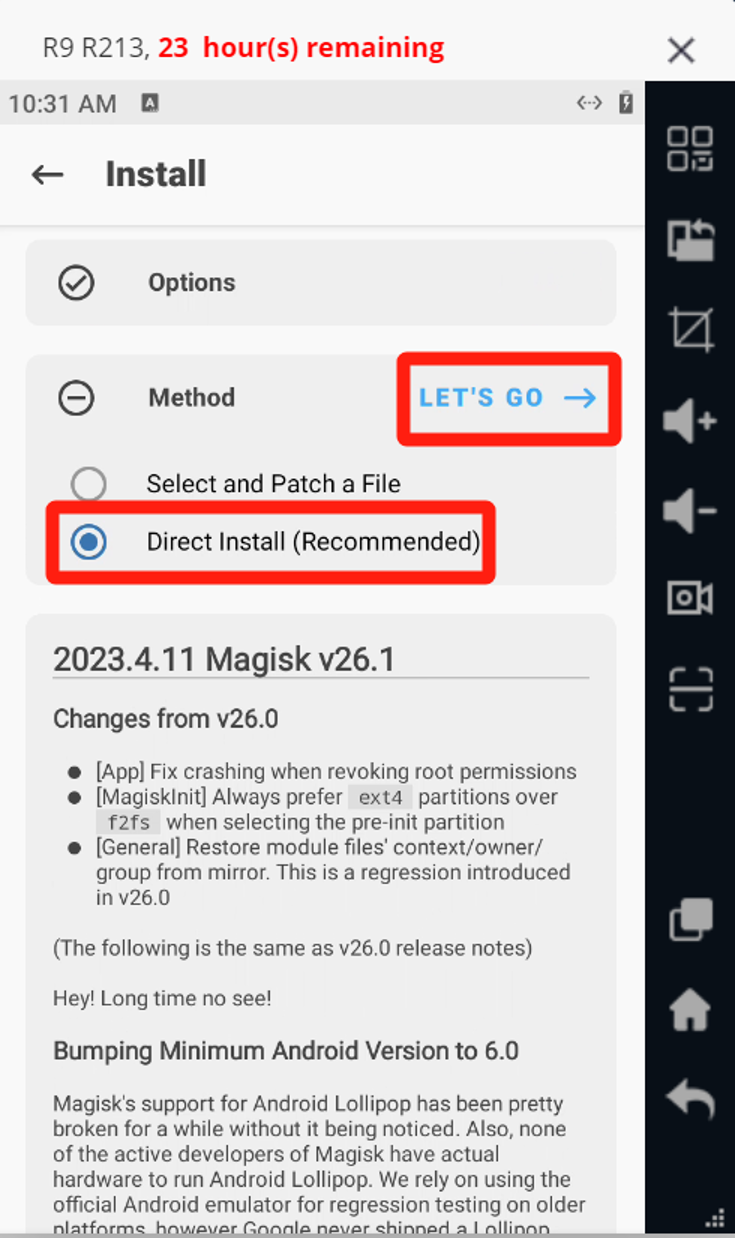
4. If the [install] button does not appear in the previous step, it is possible that you do not have root privileges.
Step 1: Open the cloud phone [Permission Management] app and turn on EdXposed Manager and magisk app permissions.
Step 2: Open [Settings]-[Applications], find magisk, click [Force Stop] and reopen magisk .
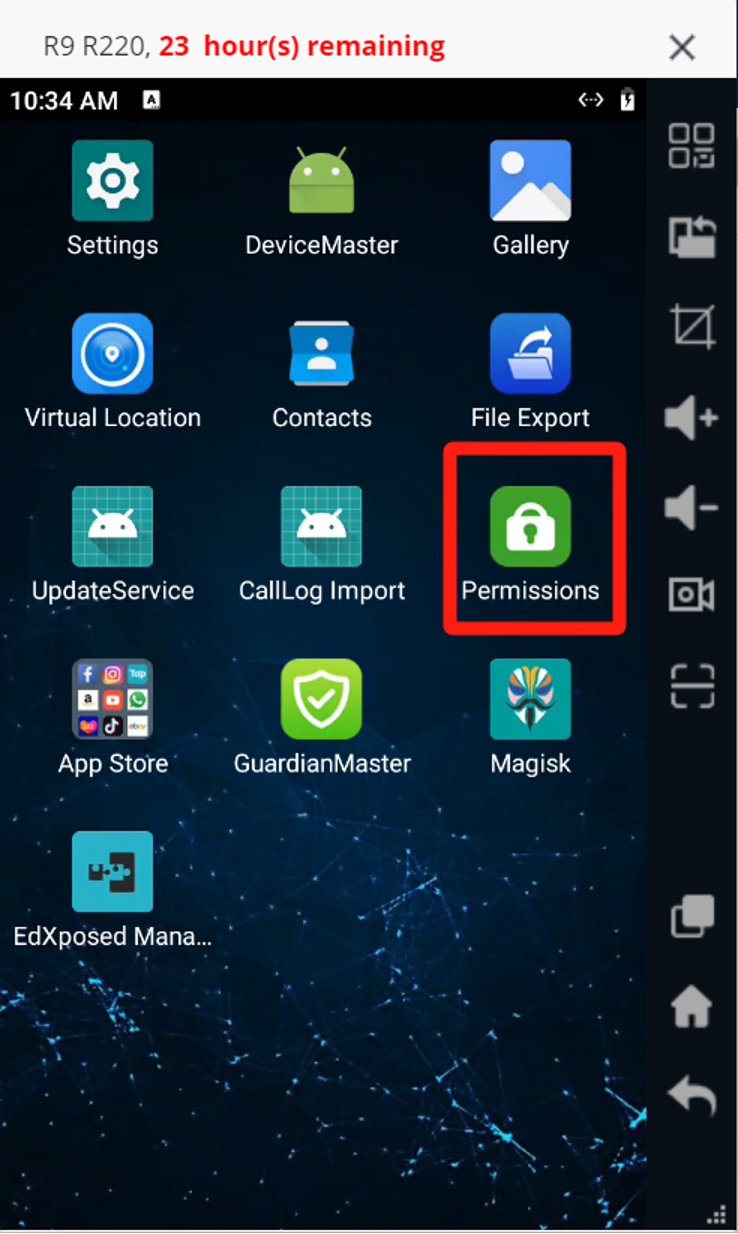
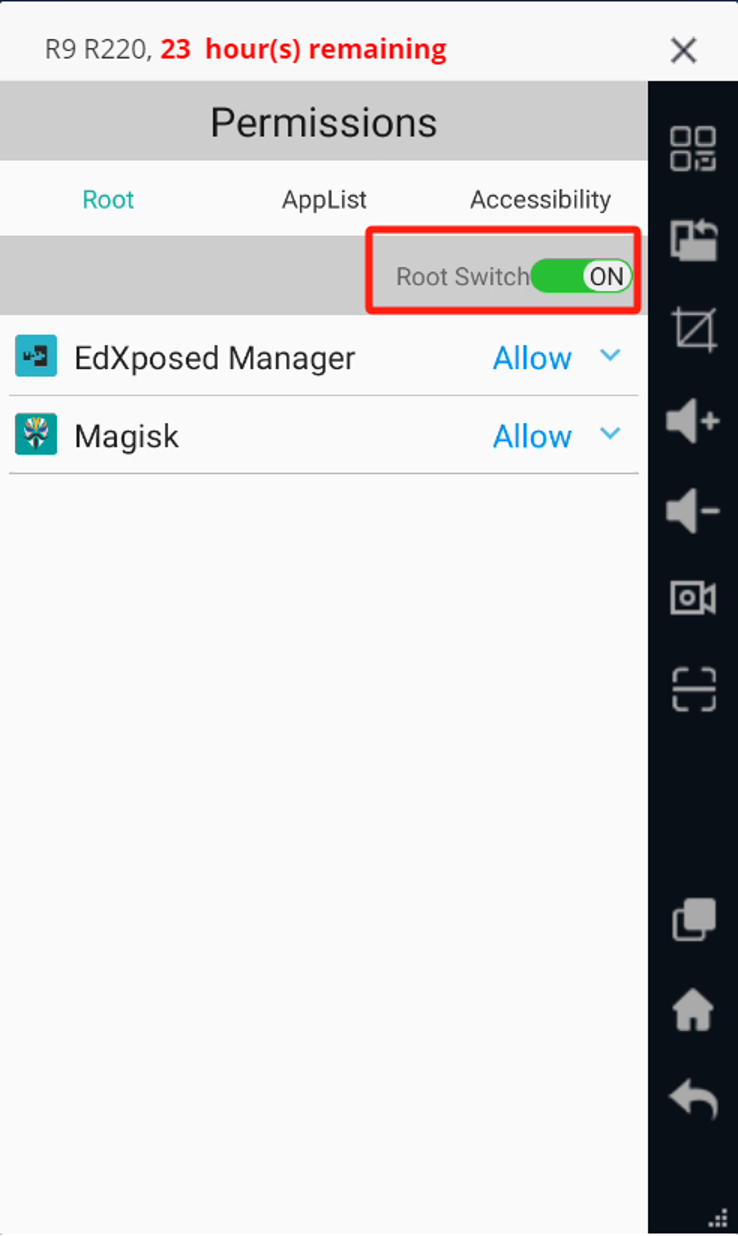
5. After the end of the reboot, download the required plug-ins according to the link, Baidu Skydisk link:
https://pan.baidu.com/s/1V-qR0SHsbmSnqcH6-5Q30A Extract code: hmed
https://pan.baidu.com/s/1SeHMia9R1X8_GdRgvPCtcw Extract code: hgst
6. Open Hippo Cloud-[Upload Files] and upload the downloaded files starting with Riru to the /sdcard/Download/ path on the cloud machine.
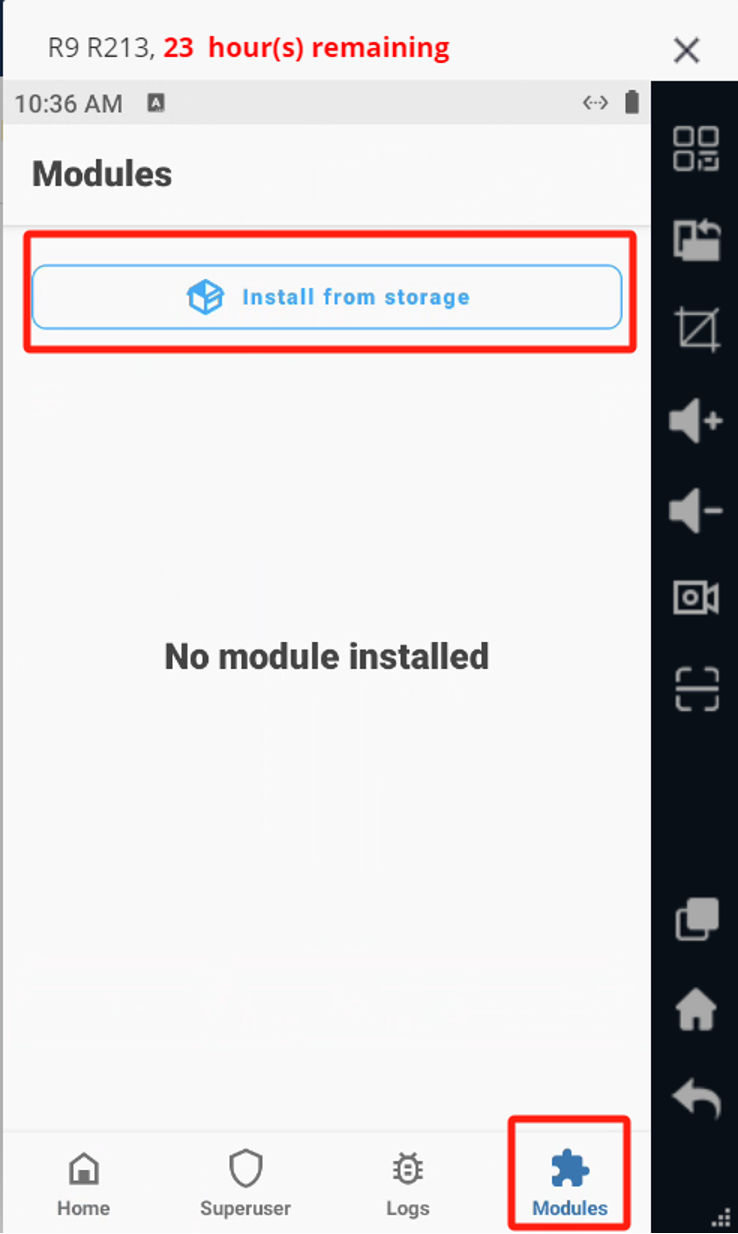
7. When the upload is complete, open the cloud phone control window and open [Magisk]. Click [Modules] in the lower right corner and click [Install from storage].
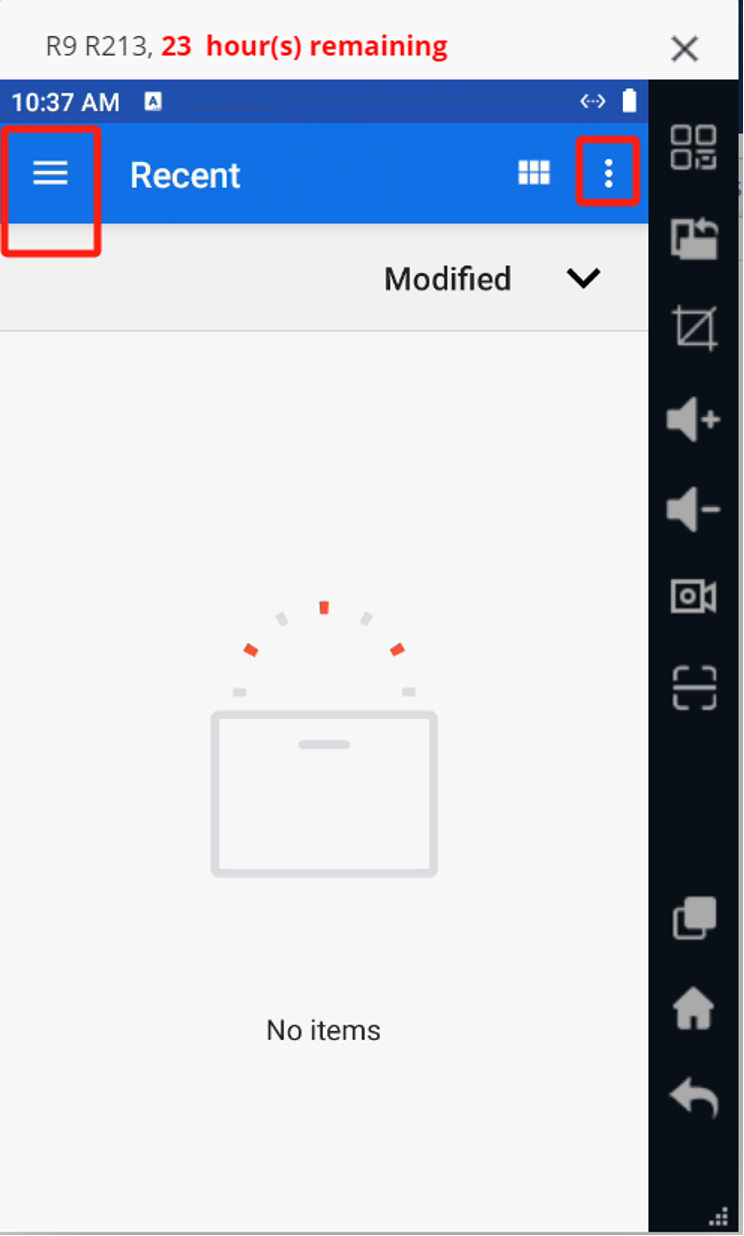
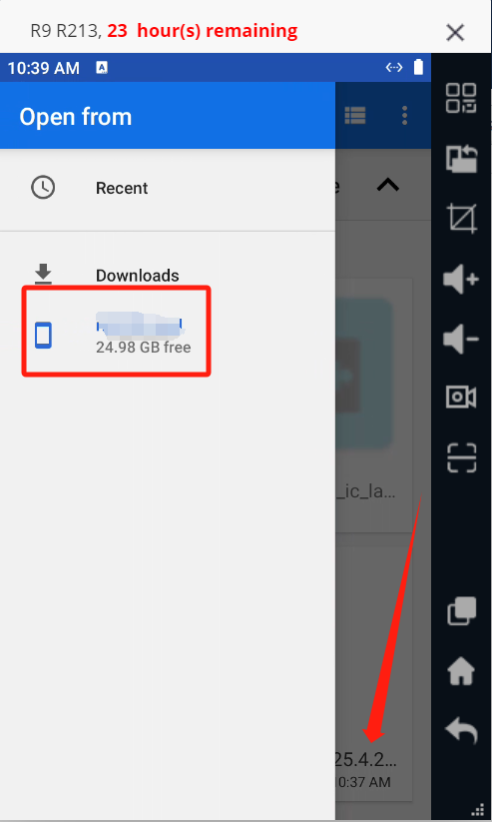
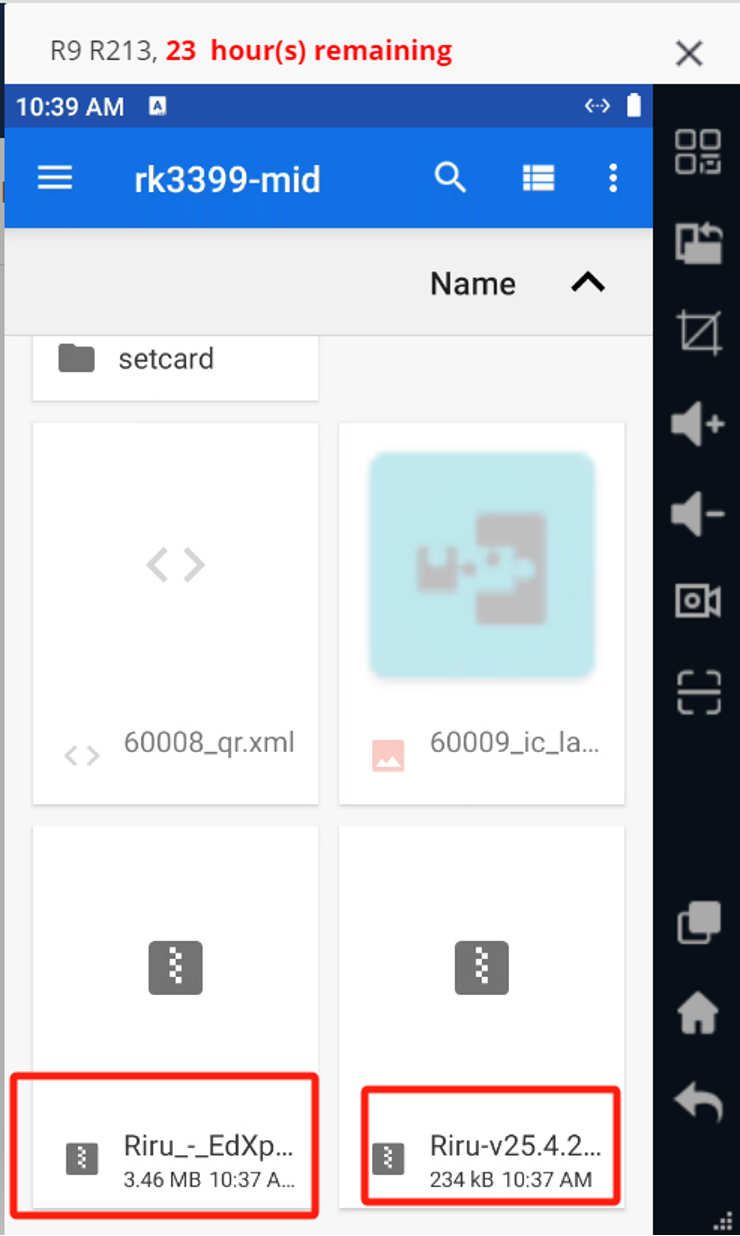
8. First, click the icon in the upper right corner - click [Show Internal Storage], then click the icon in the upper left corner - click [Storage Space]. You can see the two zip files you just uploaded to your cloud phone.
9. Please install the file beginning with Riru-v25 first, restart your cloud phone after installation; then follow the above steps to install the file beginning with Riru-EdXposed, restart your cloud phone after installation.
10. When all operations are complete, the EdXposed framework is installed.
